
How to clean Xbox 360? Cleaning your Xbox 360 is important to maintain its performance and appearance. Regular cleaning can help prevent dust buildup, which can cause overheating and damage to the internal components. Cleaning your Xbox 360 is a relatively simple process.
Your Xbox may require cleaning if it makes that annoying buzzing noise while operating. For Xbox 360 maintenance, the side panels of your Xbox must be taken off to start cleaning it. Remove the outer case after that. The inner casing and delicate parts can be removed after the outer casing has been removed. After that, you’re prepared to clean the Xbox using canned air and a soft bristle brush. Reassemble the Xbox after cleaning it, and enjoy your sparkling console.
Well, you may hire specialists to clean it. However, the process takes time and can last lengthier than you expect. Consequently, it is crucial to comprehend the methodology. And spend around 30 minutes cleaning it at home. Let’s examine the procedures for how to clean the Xbox 360.
How To Clean Xbox 360? | The Easy Way
How to clean your Xbox 360? An Xbox doesn’t have a dirty interior. It takes only a few minutes to quickly and easily clean your Xbox’s exterior. It may become gritty, but it would take a lot of dust to interfere with the operation or slap you in the face with a red death ring.
Taking Away The Side Panels
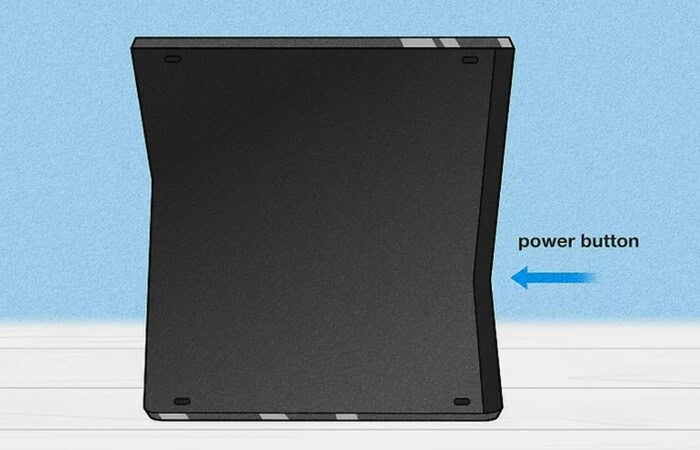
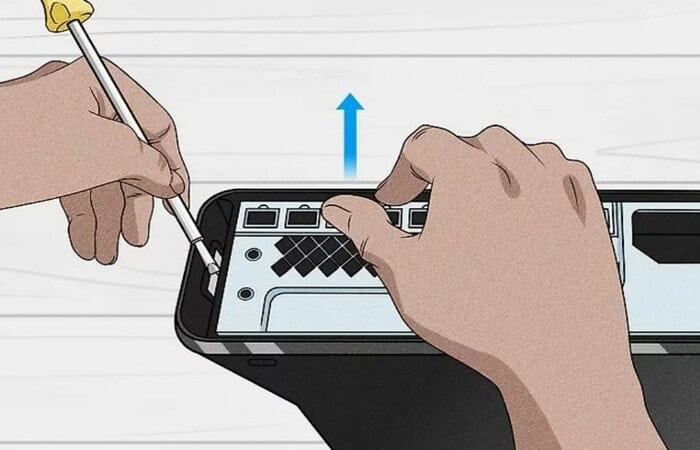
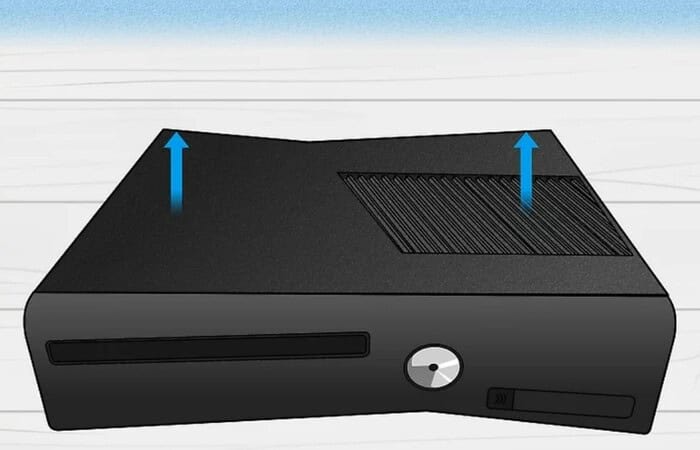
- How to clean Xbox? First, you should take out your Xbox’s side panel vent. Place your Xbox so that the forward, which is where the power switch is, faces your right. The exhaust on the Xbox should be facing upwards, and it should sit on its thin end. Begin by arranging it on a smoothed, firm mattress.
- Take the Xbox’s vent out. Insert the screwdriver slowly into the vent’s outermost right exhaust hole.
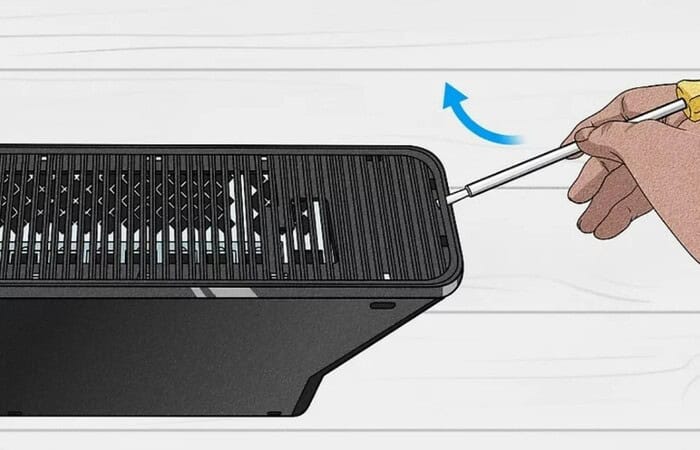
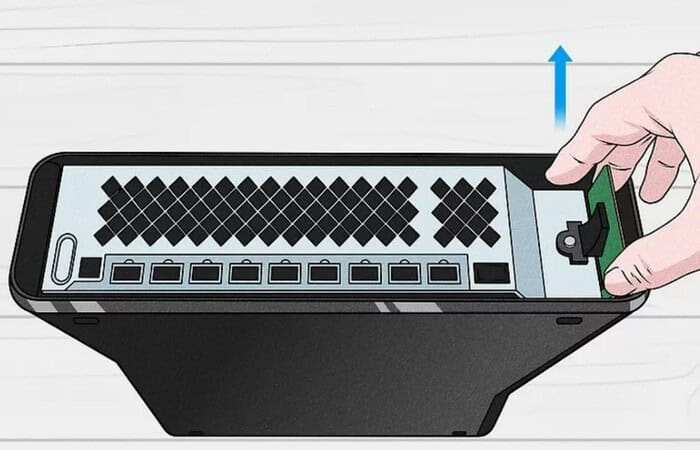
- Firmly and moderately loosen the vent until it partly breaks free. With mild pressure, keep pulling the vent up with your fingertips until it separates.
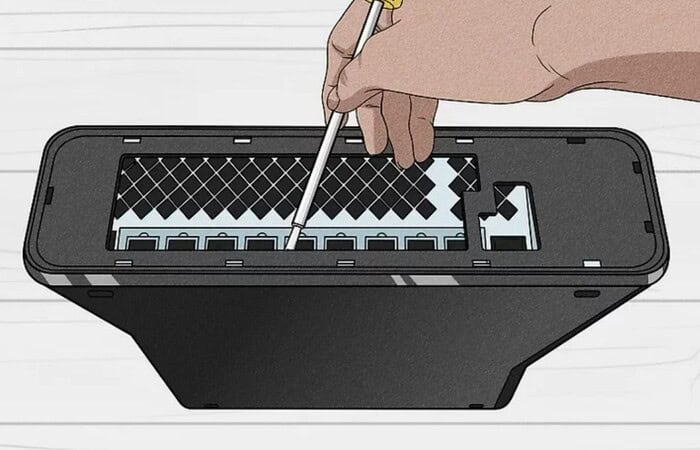
- You can reach the side panel release hinges. Use your fingernail to raise the rim of the silver or black panel boundary at the Xbox’s right back section. The border will have three releasing hooks that resemble tiny slots in the area inside the boundary.
Further Steps On Removing The Side Panels
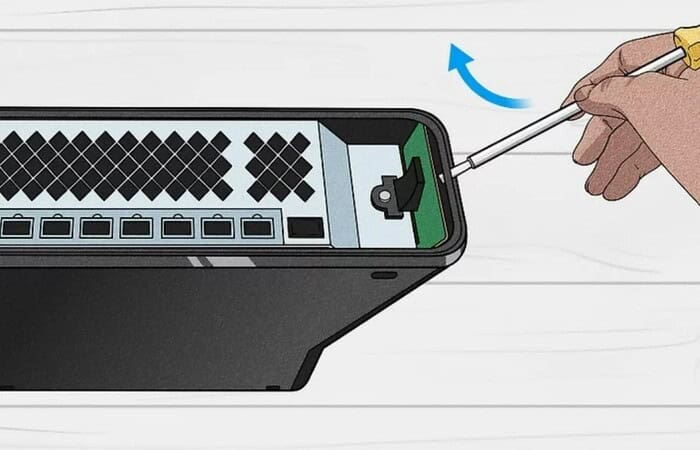
- It is essential to disconnect the side panel fasteners. Your screwdriver should fit into the gap in the back quadrant. With your spare hand, gently push forward while grasping the surface. That side panel corner should lift and out once the tab disengages.
- Get rid of the wifi card. You can find a little square-shaped component on the left edge of the space underneath the side panel, which is screwed into a USB docking station. The wireless card is this. After removing the screw using a driver, remove the memory card from the USB slot.
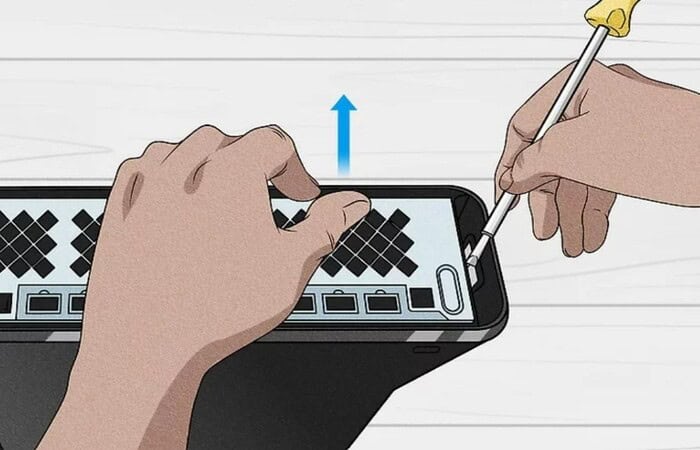
- From the other sidebar, remove the vent. Then, turn the Xbox, so the side with the discarded vent or side plate faces down. Utilize your screwdriver and a strong hand to pry open the exhaust to the side of the access door like you did with the previous vent. Use your fingers to release the access hatch.

- Loosen the second side panel’s release tabs. The releasing hooks for this pane are identical to the ones for the previous sidebar you dismantled; however, the clip just above the access door will be slightly bigger, and the tab underneath it a little smaller. Remove this side panel using the same way you removed the last one.
Taking Off The Outside Casing
Remove the outside casing by following these steps:
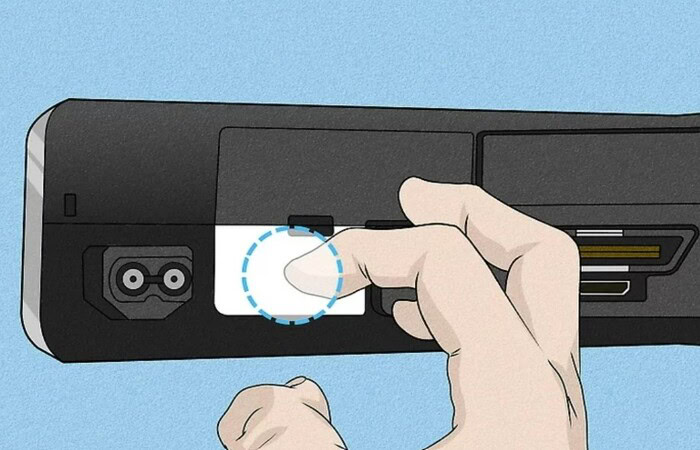
- Find the release for the back panel. Reposition the Xbox so that the back, which has broadband and other hookups and video output, is facing up. On the side, a white, rectangle label will be present. The UL listing will appear beneath this label. To check for an indent, run your fingertip over the label next to the UL rating. It is the point of release.
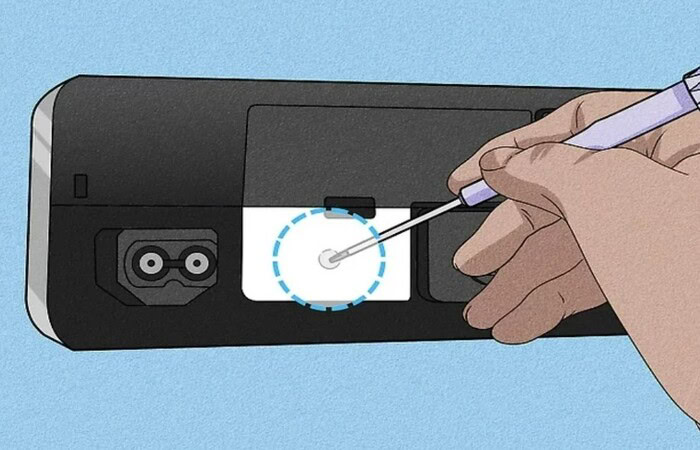
- To retrieve the rear panel latch, drill a hole. To slide your screwdriver into the opening, you ought to be capable of pushing it through the label on the rear panel. Use the tip of a utility knife to carefully cut around the inner perimeter of the screw hole to simplify this process.
- Get ready to pull the first group of inner tabs. Align the Xbox to stand straight up with its back to the left. You should notice a silver portion on the side of the outer border. There is a small button below this. Push the tab forward.

Removing The Tabs
- Then, take two casing tabs off. Place your fingers on the metal portion of the inner panel while your screwdriver is still in the tab, and then gently push outward on the casing to connect the Xbox 360 Controller To the PC Without a Receiver. The tab ought to be released at this point. To release the second tab, squeeze the tiny hole you just made close to the UL listing.
- Turn off the final two tabs. Place the Xbox, so the side panel faces up and the rear faces to the left. There will be two discernible tabs to the left where the vent was removed. Apply lightly downward pressure to the plastic case while holding onto the metal portion of the inside panel. Release the two tabs slowly.
- To remove the Xbox’s casing, position it. The tabs are now disengaged, and the case may come off at this point. As a result, you will need to delicately move the Xbox so that it is upright, with the front panel facing forward.
- Next, take the case off. With a little help from your fingers, the casing may be opened from the back. Move the case forward towards the system’s back once the back has been split, then lift it upward. To retain all your parts, flip the removed case over and insert the wireless card and outer side panels.

See Also: How To Use Laptop As Monitor For Xbox One | Step-By-Step Guide
Taking Off The Inner Components
The next steps on how to clean Xbox 360 are as follows.
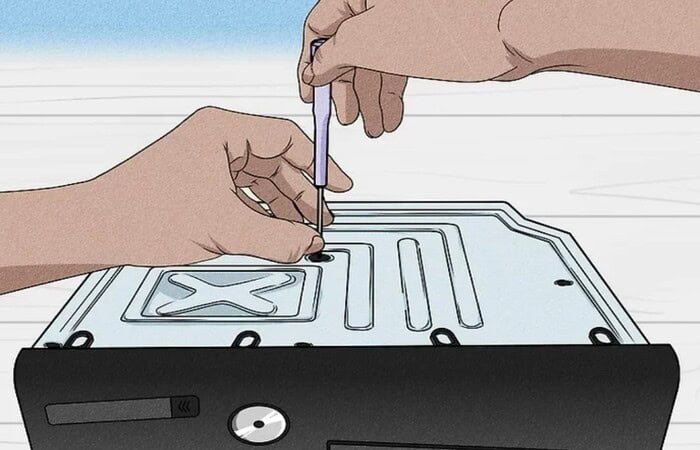
- Remove the metal inside the casing. Five black screws must be removed to accomplish this. The first screw will be in the front left corner, the second in the front side’s middle, the third in the center of the casing, and the last screw will be in the back right corner.
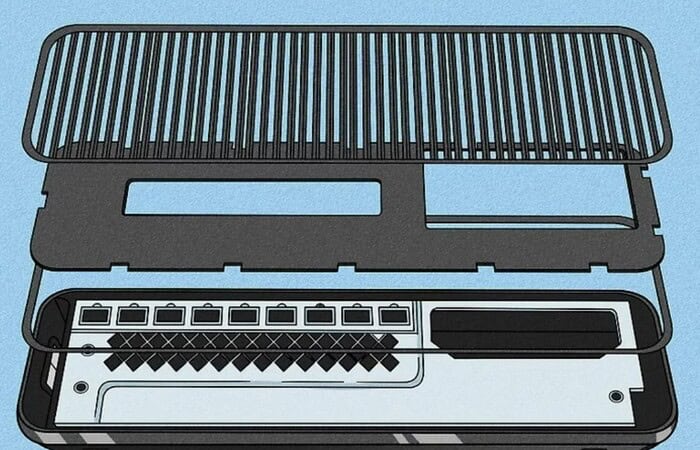
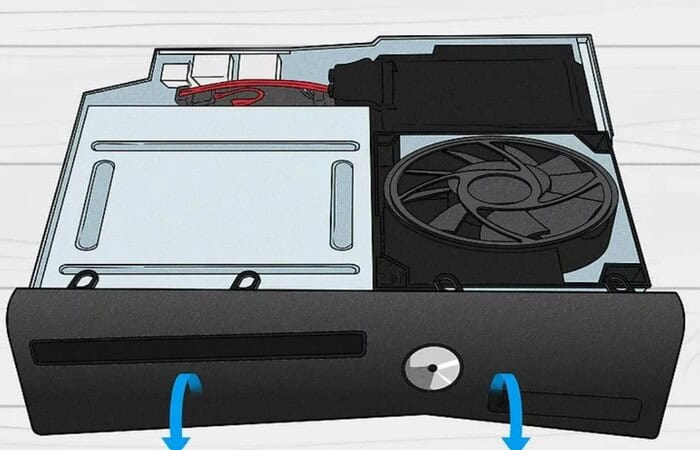
- Take away the interior casing. Overturn the box. To keep the case from falling apart as you do this, hold it tightly. Pivot the case, so it opens up at the rear, just like you did when you removed the first portion. Then, slide the shutter about a half inch once the case has parted at the back. Now, the case ought to come loose.
- Next, the faceplate should be leveled on the work surface. Place the Xbox so that the faceplate is facing the left. It would be best if you didn’t pull the faceplate too far because it will be corded to the system. When the case is taken off, the visor detaches. Place it face down in the direction of the side to which it is attached.
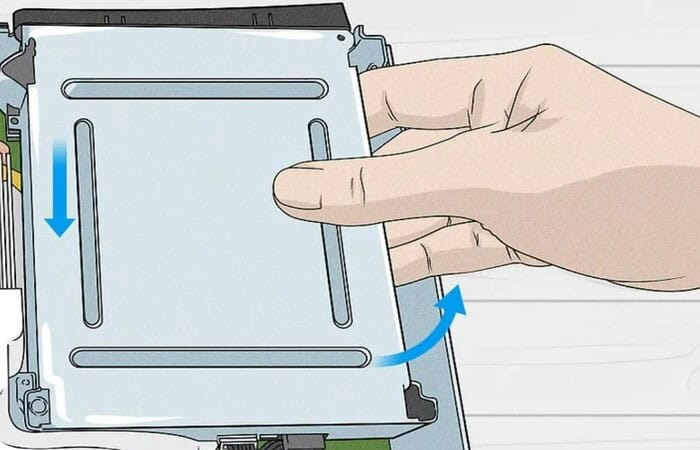
- Take the drive out. The drive is a rectangular, silver box. Keep its left side stationary and raise it from the right side. With your index finger, reach below the cable, and your thumb, pinch down on the cable. To release the cable from the drive, wiggle it back and forth. Apply this technique to both connecting connections.
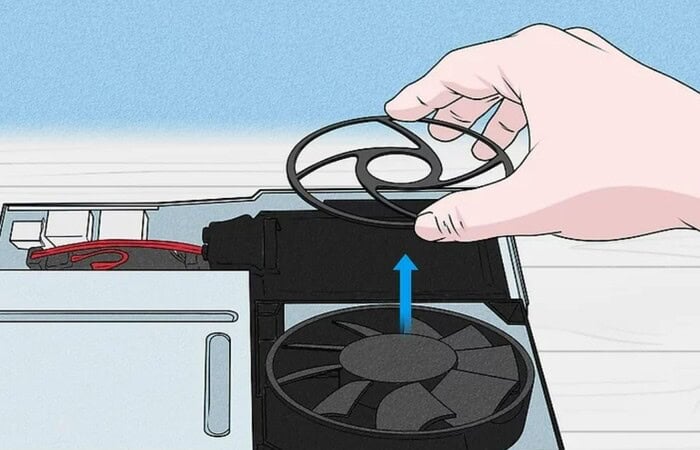
- Take away the fan shield. The air shield is a thick plastic piece that completely encloses the fan. The barrier can be easily separated from Xbox because it is not held in place by connectors. Upon detaching it, please note its orientation so you can later reinstall it.
Relinking Hardware And Sterilizing The Xbox
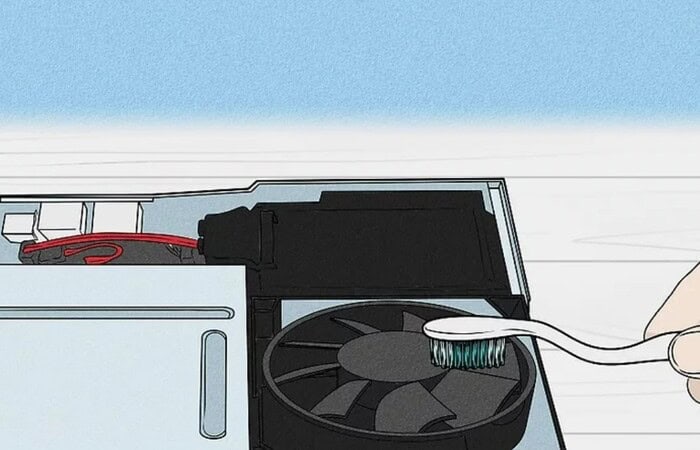
- For Xbox 360 cleaners, use a soft-bristle brush to remove dust. The fan and the heat shielding surrounding it are prone to dust accumulation. Use a smooth brush of delicate bristles to scrub these regions gently. Apply the same procedure to any other buildup-prone spots inside the Xbox.
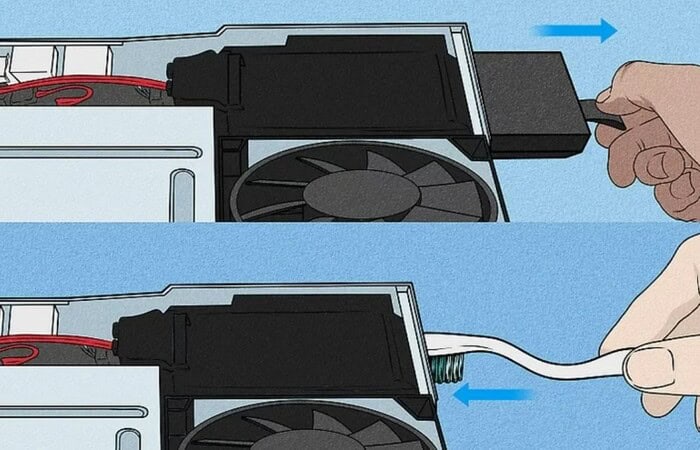
- If needed, clean Xbox 360 game from the area around the back drive. In some circumstances, the black drive region in the back left corner may have accumulated dust on top of it. Pull out this drive by inserting a pulley into the slot on the system’s back. Set this aside and clean dirt from the region where the drive was removed using your brush.
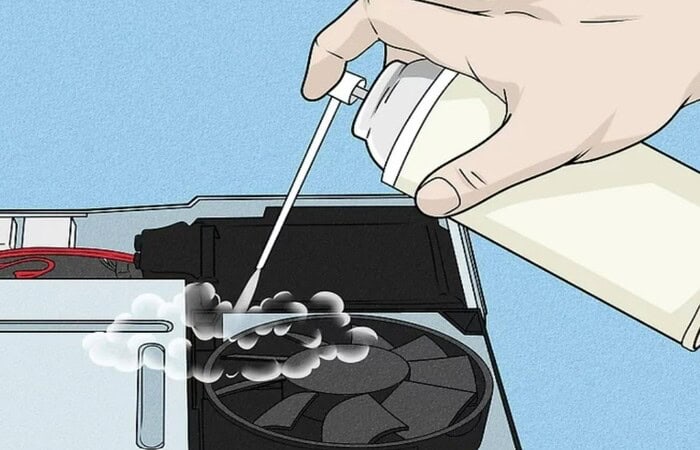
- To remove any dirt from the Xbox, blast it off with pressurized gas. To remove the loose dust inside the Xbox, use compressed air or a compressor. Put your finger between the blades before spraying the fan with air to keep it from moving.
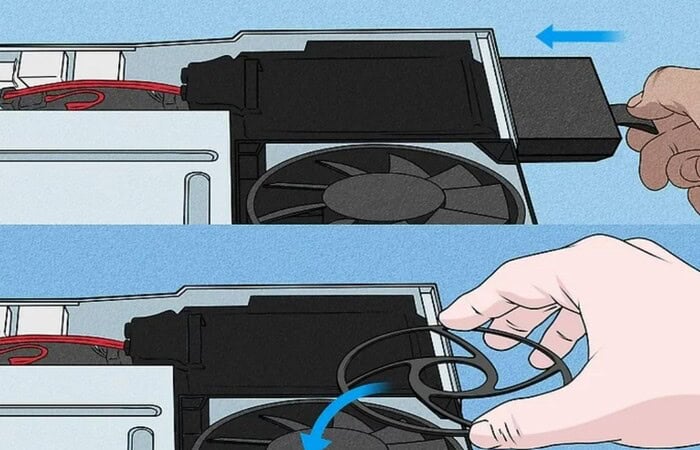
- Then, reinstall the internal parts. Reposition the excised section of the black disc. If necessary, reposition the black rubber strap on the drive, so the holes are along the head of the drive. Reconnect the two cords to the silver drive. Then gently push it forward as possible after setting it back into position.
FAQs
How to clean Xbox 360 the quickest and easiest?
Use pre-moistened disinfection wipes or a soft, microfiber cloth soaked with mild detergent and water. Before sanitizing your Xbox, turn it off and unplug it from the wall.
I don't want to open my Xbox, so how can I do Xbox 360 maintence?
You can rapidly wipe the exterior of your Xbox by wiping it down with a dry clean rag to get rid of dust, oils, and smudges. Additionally, you can carefully blow out the ports and vents of your Xbox system with compressed air.
Can there be water damage in Xbox?
I advise you to disconnect the console and let it air dry for 24 hours. Unfortunately, we must inform you that your Xbox needs maintenance if it is functional and will switch on.
Should you immerse an Xbox in rice?
I wouldn't suggest covering the console in rice because the rice might get in through the vents or the disc tray hole. It will dry out on its own in a few days as long as the power is entirely cut off, but because the operator reported smelling smoke, the harm may have already been done.
Conclusion
The Xbox 360 is getting older, and as a result, it will experience more issues. How to clean Xbox 360? We go over a list of preventative maintenance you can perform to increase the lifespan of your Xbox 360, going from easiest to most difficult.

Follow me to stay updated on the latest technology and computer news from around the world. Join me in spreading the love for tech!
