
Xbox is the most widely used platform to play games online. The Wireless Xbox Controller is the most common game controller for the Xbox One and Xbox Series X/S domestic video game consoles. It’s also sold for Windows-based total computers and is compatible with various operating systems, including macOS, Linux, iOS, and Android. As a result, it is widely recognized as one of the best online gaming controllers available. It does, however, degrade and require repair from time to time. So one needs to learn how to disassemble Xbox One controller.
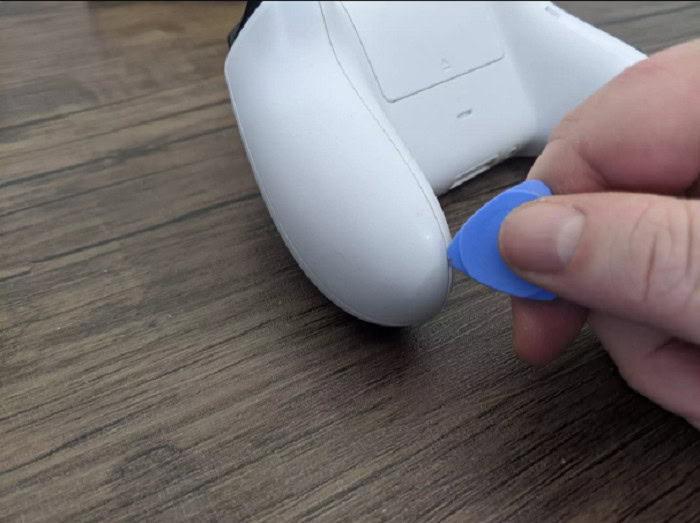
To accomplish this, you can insert a plastic spudger or a flathead screwdriver into the seam running alongside the controller handle. Gently maneuver the tool along the seam to separate the plastic covers on the back of the handles. Proceed to detach and remove the plastic panels from both handles.
This article will help you to learn how to disassemble Xbox Controller easily with two different methods.
Contents
How To Disassemble Xbox One Controller?
There are two ways by which you can disassemble Xbox One Controller. Follow these methods, and you can effectively open up your controller.
See Also: 6 Best Xbox 360 Singing Games Of 2023
Method 1: With Torx
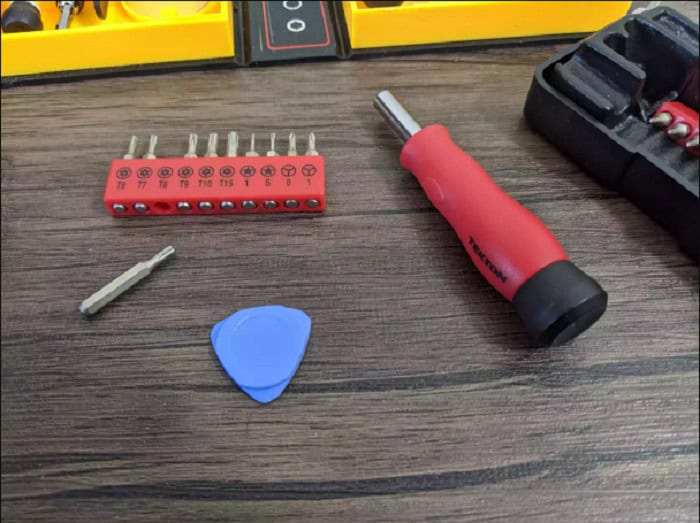
Find a well-lit, tidy workspace before removing the Xbox One remote. If you don’t have them already, you may want to get the following items:
- T-eight protection
- Torx prying tool
You may use a Torx bit in a motive force, a socket wrench, or a dedicated Torx motive force, so it must be a T-eight safety Torx. You are using something small enough to fit in the gap between the controller housing and stop covers for the prying unit. Use a plastic device to avoid damaging the controller’s housing if possible.
These are the steps you should follow to disassemble Xbox One controller.
- Consider running towards the tray to prevent screws or other parts from slipping to the ground or being misplaced.
- Remove the orange prying tool from the device package.
- Slide the prying mechanism between the grips’ rubber seams.
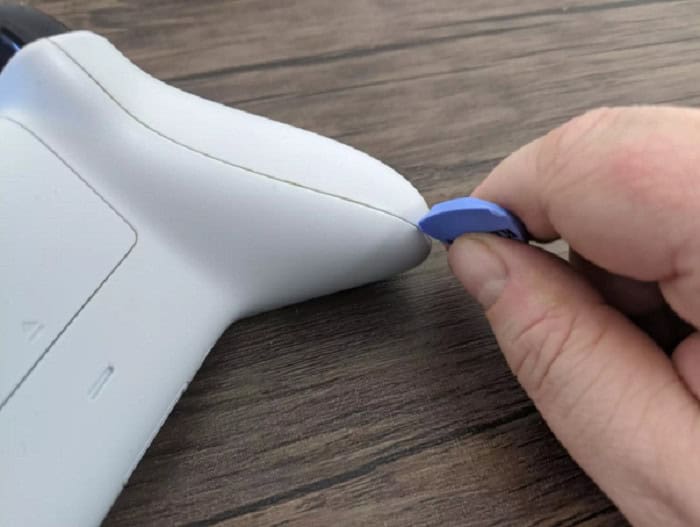
- Pull the grip away from the central controller’s body. It’s worth noting that some glue may hold it under the acrylic, so don’t be afraid to use that force.
- Do this with each grip once more.
- After that, carefully remove the screws.
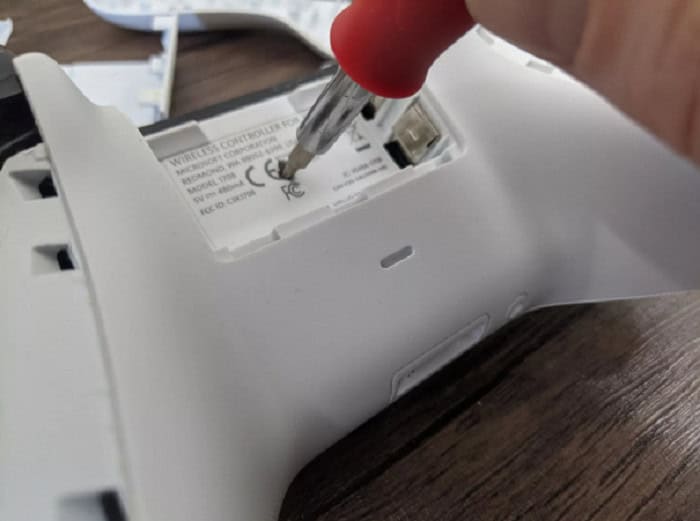
- After removing all the screws, the Xbox controller will fall off. Be careful because yanking it apart so hard will damage the cord connecting the battery to the circuitry.
- Remove the T8 screwdriver from the package and remove the five safety screws. Each of the screws is concealed under the adhesive sticker on the battery housing.

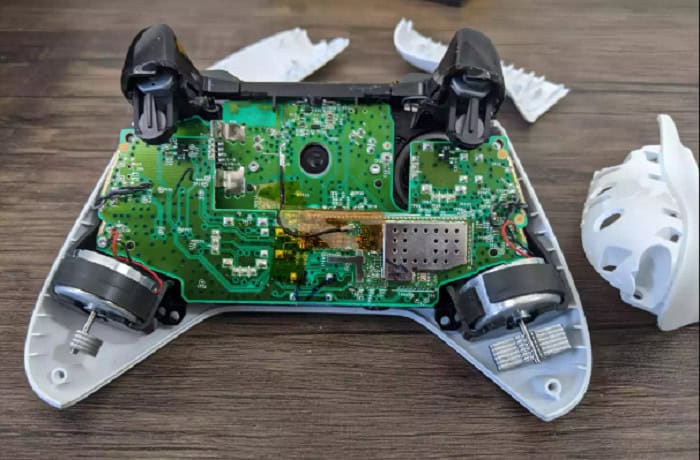
- Examine the gamepad’s internal workings now. However, take care not to misplace any of the components!
- The controller comprises three main components: the front faceplate, the circuitry-filled frame, and the backplate with the battery compartment. As you manipulate the joystick, be careful not to miss any components.
When reassembling the X Box controller, don’t forget to cover all battery ports in the backplate, and the audio jack under it snugly matches the outer casing.
Method 2: Without Torx
Since it is relatively easy to use, disassembling your Xbox One controller with a Torx screwdriver is a good option. But if you don’t have any at home and still want to fix those annoying unruly controller keys, there is a way. Follow the instructions below to learn how to disassemble the Xbox controller without a particular driver.
- Get a 2mm slotted and flathead screwdriver, preferably made for electronics.

- You will require a two-millimeter slotted bit and a flathead screwdriver, seven screws total, including a secret bonus screw.
- Using the screwdriver as a wedge, you can quickly unscrew them. You must unscrew both of them, or they will not fall apart.
- You’ve successfully disassembled the Xbox One controller without using the special screwdriver!
The relevant information is which one ought not to alter the screws, screwdriver, or move to look for a custom screwdriver to carry out this academic on the way to take aside Xbox One controller!
The critical information is that you cannot change the screws or screwdriver or go on a quest for a custom screwdriver to complete this tutorial.
See Also: How To Use Laptop As Monitor For Xbox One | Step-By-Step Guide
How Can You Open A Wired Xbox Controller?
- Check and switch off the controller.
- Turn the joystick around so that the back of it is facing you.
- In the lower-right center of the controller, there is a small sticker with a barcode, though the barcode can fade over time. This sticker is next to the Microsoft hologram. Remove this sticker to expose a screw hole. (Removing this sticker voids all existing contracts with the controller.)
- From the back of the controller, take out the seven screws and set them aside. Put them in such a place where you find them easily.
- Disassemble the Xbox One controller shell into two parts. Remove the bottom plate from the controller case.
- Remove the top plate (containing two bumper buttons) from the controller shell.
- Carefully remove the circuit board. You can replace the analog sticks by picking and pushing straight up.
- Fix the D-pad (Directional Pad) to the top half of the controller case. To clear the D-Pad, remove the two small screws. You will require a smaller screwdriver since these screws are smaller than those on the controller casing.
- You can detach the D-pad on an Xbox 360 wired controller without extra screwdrivers.
- The D-Pad is easily replaceable. After removing the two screws, you’ll find two small clips inside the D-Pad. Slowly pry the clips apart to separate the two parts of the D-Pad.
Repairing The Xbox Controller
Try to do repairs after you correctly disassemble Xbox One controller.
Such concerns can be kept constant by cleaning components, while others necessitate upgrading components. Sometimes, you need advanced skills, such as soldering, to remove and replace parts. Depending on your enjoyment level, you might leave more of the upkeep to the experts.
Other repairs, such as fixing or replacing the D-pad loop, are much more accessible. If your D-pad isn’t working correctly, try this quick fix:
- Carefully pry off the spring metallic D-pad ring with a prying device or tweezers.
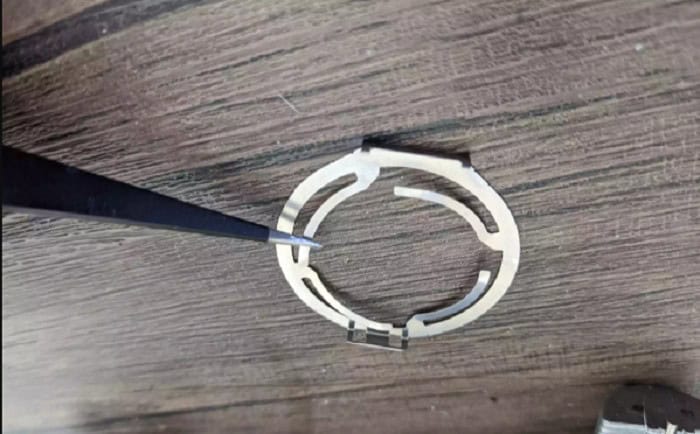
- Carefully raise the palms at the D-pad ring to practice applying more air, then reassemble. If the problem persists, you might need a new D-pad ring.
FAQ’S
How do you take apart an Xbox One controller?
To take apart the Xbox One controller, you need to put a flat-shaped screwdriver into the panel between the two buttons at the top center of the controller. Next, pull in the plastic to remove it using your fingers; give it more force if the bumper button covers and top covers are stiff.
What tool do you need to take apart the Xbox One controller?
The most recommended tools to take apart the Xbox One controller are the T8 Security Torx Screwdriver and T6 Torx Screwdriver. These tools require minor efforts to swap out any controller shells or bumpers quickly.
How To Clean Xbox Controller Stick Drift Without Opening Controller (2023)?
To clean the fixed Xbox controller stick Drift without opening the controller, you can use compressed air vacuum machines to remove all the dust and specks of dirt from the joystick. Next, use a cotton swab soaked in rubbing alcohol to clean it more neatly.
How do you fix a drift stick?
To fix a drift stick of the Xbox controller, press both analog sticks of the controller for 10 seconds continuously. Next, put the joysticks in the upward direction and blow air in the opening created while doing this. Then start rotating the joysticks for about 10 seconds in a clockwise direction and do the same in the anticlockwise order.
Conclusion
The Xbox controller is now one of the best console and PC controllers available. Its ergonomic and minimalistic design will charm many people, while its plug-and-play Windows usability will make it extremely useful for minimal tech-savvy computer users. Although you can take disassemble the One Xbox controller without too much hassle, there are specific power issues to be aware of, and you’ll also need a pair of advanced gear that you probably don’t have on hand.
This is how you can disassemble Xbox One Controller. We hope this article has helped you open your controller and fix the issue. Now that you know how to improve your controller, you can enjoy the best Xbox games online. Happy gaming!

Sourabh Kulesh, Chief Sub Editor at Gadgets 360. and TechiePlus, writes technology news online with expertise on cybersecurity and consumer technology.
